Inspecting the car will help you determine the existing condition as well as highlight potential issues that could arise in the future. By finding out what’s happening underneath, you’ll either feel more confident that you’re making a great investment or you’ll discover that there are hidden flaws that could give you more leverage for negotiations.
Here are a few things that you should check before you seal the deal.
Check the documents

Get the papers from the seller. Make sure that the specifications corresponds with what they got on paper. Take note of the VIN. Make sure that it also matches. The VIN will be on the engine, on the front end of the frame, the driver’s side of the interior dash and the trunk.
This will help you make sure that you’re not buying a glued on vehicle. This will also help you determine if the seller is the type that you’d rather not deal with. You will know by his willingness to entertain scrutiny and interrogation.
Check for dents and scratches

Check for awkward dents to make sure that it was not wrecked. Sometimes wrecked vehicles will still have those after it’s been done over. It will still leave small indicators like that. So make sure that you watch out for those.
Look for scratches and dings. It should tell you how the car was used. You can also use it to to knock down the price a bit. Check the inside seams, make sure that they’re all still factory looking. If the alignment does not look right be sure to ask why.
Check the body lines make sure that they’re even. Uneven body gaps will allow water to penetrate and will corrode the inside. It is also your indicator that it has been through the shop for a major body work.
Check the tires
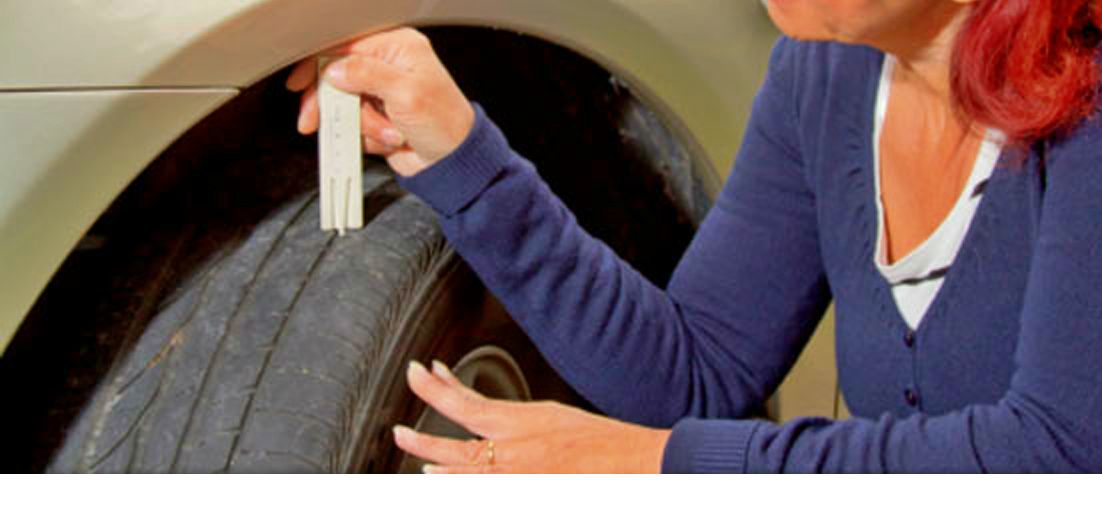
Tires can tell alot about the car. Make sure that they match, if not ask why. They have played around with it for a reason.
Check the wear on the tires, make sure the depths of the thread are still good, not enough depth means you will have to replace it soon half a finger nail will last a while.
Make sure that the steel radio belt is not sticking out. A wear like this is an indicator that there’s a problem with it’s suspension.
Tires have 4 digit codes:
- eg1. “1206” – means that it was manufactured on the 12th week of 2006 –
- eg2.”0114″ – it means first week of 2014.
If you find a car with brand new tires that means that there’s a problem that they’re trying to hide. Also make sure that there’s a roadworthy spare tire.
Check the mileage
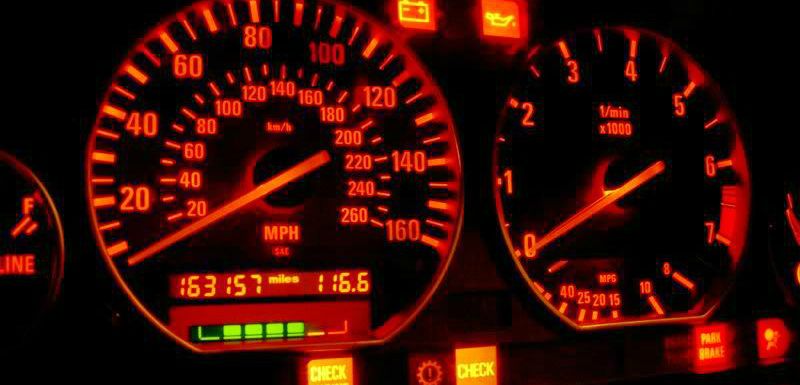
Odometers are often rolled back so the seller can make more money. Cars with low mileage are priced higher. Ommit 35000-40000 miles and it will artificially inflates the value to about $2500 to $3000.
Here are a few tips to determine if the odometer has been tampered.
- Compare the mileage on display and the average mileage a year.
- Check the wear and tear, make sure that it’s appropriate to the declared mileage.
- Check the title, the service records or get the vehicle history report to compare the recorded mileage and the displayed mileage.
- Check the car’s tires. If it shows 20000 mi or less it should have the original tires.
- Check number alignment. Make sure that it should not be crooked, contain gaps or jiggle.
Check the fluids
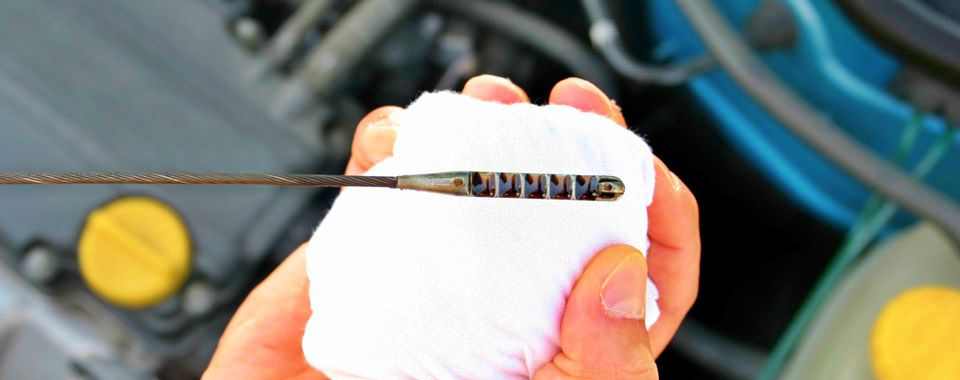
Checking the fluids will help you determine if the car was properly maintained. It will help you know potential issues that may arise in the future.
- Look at the engine oil fluid using a dipstick and a piece of cloth. Brown/yellow tinted is an indication that it was well maintained.
- Check the brake fluid . Yellow tint is good. Condensation may turn it reddish it ‘s still fine.
- Check the coolant fluid. Look into the pressurized reservoir. Lime green color for a properly maintained car.
- Transmission fluid. It is reddish for properly maintained cars. If there are creamy residue floating, that means there’s an issue.
- Check the power steering fluid. It is red or clear if it was properly maintained. Any color aside from this means there’s an issue.
- Check the battery. Corrosion around the battery can cause problems specially during winter. Make sure that the hose and belt ar still firm. Make sure that it is not worn and brittle. Feel them so you can gauge if it will last long or may give out soon and start leaking.
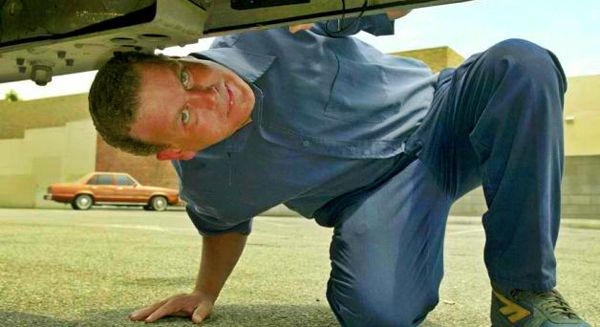
Check the engine
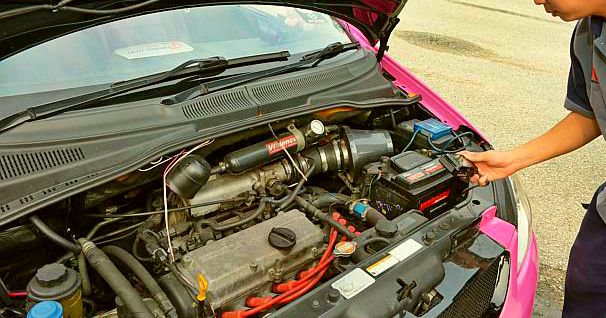
Check engine for leaks. Look under the vehicle and see if you find any.
Look at the check engine light make sure that it will not stay on when you start the vehicle. If it stays on that means that the engine has a problem.
Perform an initial engine test.
- Step on the accelarator and the break at the same time.
- Set it to drive and step on the gas all the way down while holding down the break.
- A well maintained engine will not die. When it does, that means that the engine has issues.
Check the interior
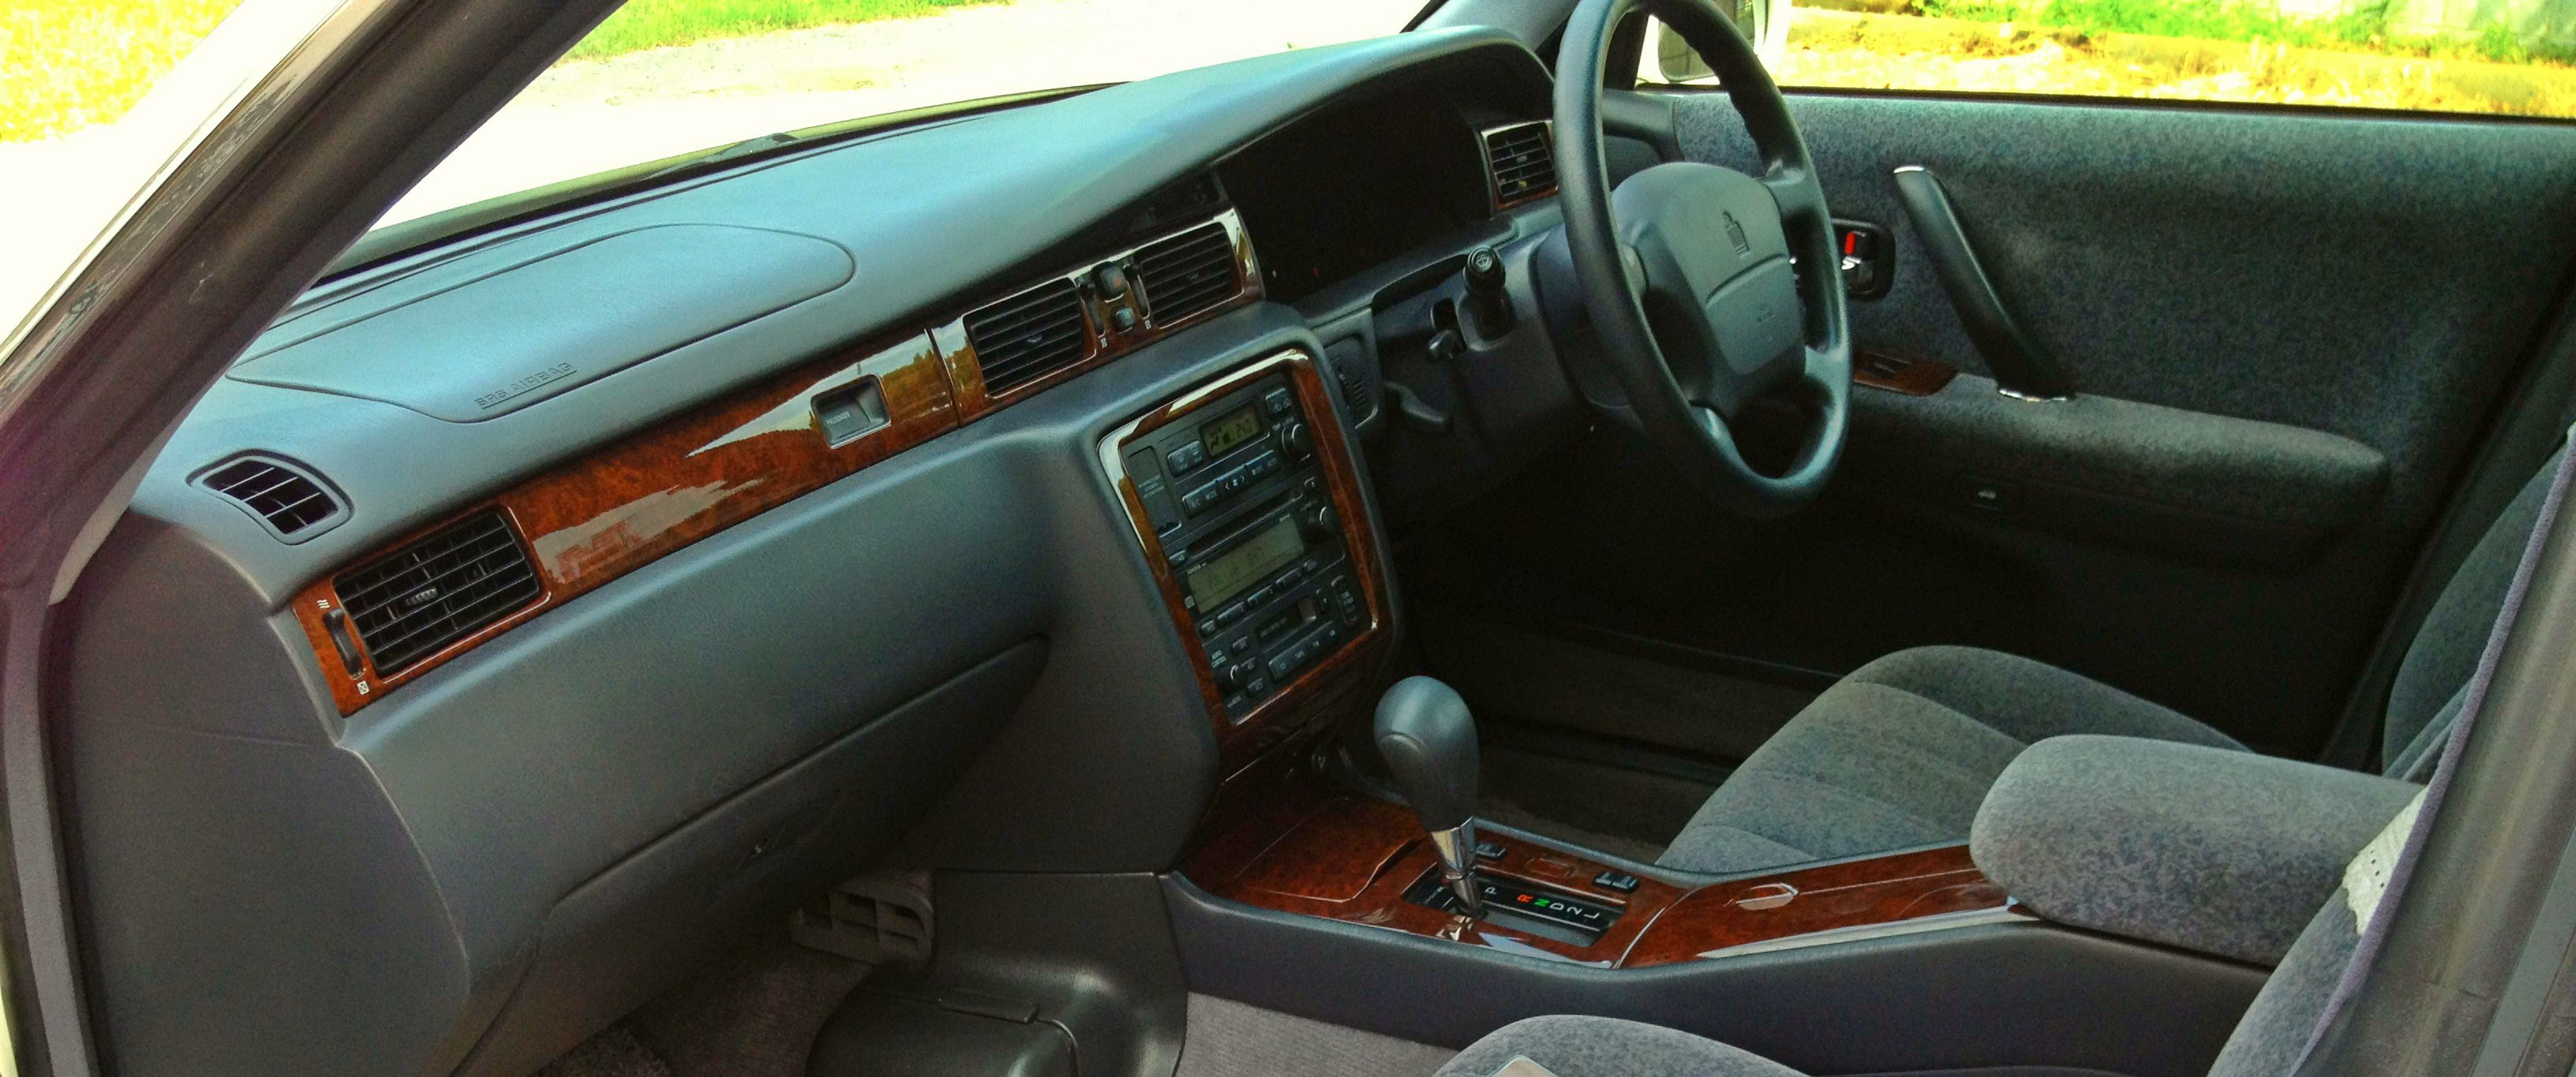
Make sure that you check all the buttons. Make sure that each is functioning right.
- Check the windows, the door locks, air conditioning and the sound system.
- Check the buttons that control the side mirrors, signal lights, wiper blades and the cruise control button.
Remove the back seat and check out the foam below for water lines and molds to see if it was flooded. Most shops will do a good job removing the waterlines outside but leaving marks on the inside.
If you notice anything that’s not functioning right, bring it to the seller’s attention have them fix it or use it to reduce the price.
Check the electrical ciruit
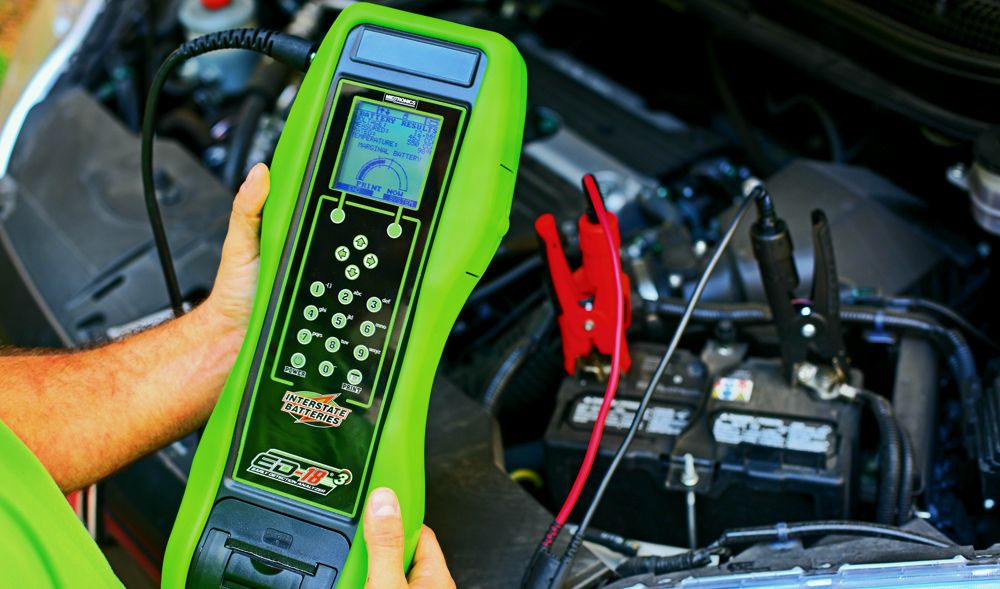
You may inspect the wiring physically if you are familiar with the path to how it was laid out or if you have a diagram on hand. You do that to check the obvious like missing and worn out wires.
Second, you should check if it is flowing properly. This is done by performing a grounding test using a multimeter or volt meter.You can bring a volt meter when you meet the seller, if you are going to a dealership they should readily have it there and you can just borrow it for the quick test
How to perform a quick grounding test:
- Place the test lead to the battery, make sure negative is place to the negative pole and positive to positive.
- Take note of the result.
- Then remove the negative test lead and test the engine. Take note of the result. If it shows the same numbers then you do not have an issue.
- You have to do it again this time the engine should be turned on.
- Do the test while the engine is running. Make sure that you get the same result or close.
- A difference of .4 of a volt or more is an indication of a grounding issue.
These are the things that will help you check for problems during your visit for inspection. Make sure that you go through it very carefully to determine if the car is worth the price or not.  US
US CA
CA Inspecting the car will help you determine the existing condition as well as highlight potential issues that could arise in the future. By finding out what’s happening underneath, you’ll either feel more confident that you’re making a great investment or you’ll discover that there are hidden flaws that could give you more leverage for negotiations.
Here are a few things that you should check before you seal the deal.
Inspecting the car will help you determine the existing condition as well as highlight potential issues that could arise in the future. By finding out what’s happening underneath, you’ll either feel more confident that you’re making a great investment or you’ll discover that there are hidden flaws that could give you more leverage for negotiations.
Here are a few things that you should check before you seal the deal.
 Get the papers from the seller. Make sure that the specifications corresponds with what they got on paper. Take note of the VIN. Make sure that it also matches. The VIN will be on the engine, on the front end of the frame, the driver’s side of the interior dash and the trunk.
This will help you make sure that you’re not buying a glued on vehicle. This will also help you determine if the seller is the type that you’d rather not deal with. You will know by his willingness to entertain scrutiny and interrogation.
Get the papers from the seller. Make sure that the specifications corresponds with what they got on paper. Take note of the VIN. Make sure that it also matches. The VIN will be on the engine, on the front end of the frame, the driver’s side of the interior dash and the trunk.
This will help you make sure that you’re not buying a glued on vehicle. This will also help you determine if the seller is the type that you’d rather not deal with. You will know by his willingness to entertain scrutiny and interrogation.
 Check for awkward dents to make sure that it was not wrecked. Sometimes wrecked vehicles will still have those after it’s been done over. It will still leave small indicators like that. So make sure that you watch out for those.
Look for scratches and dings. It should tell you how the car was used. You can also use it to to knock down the price a bit. Check the inside seams, make sure that they’re all still factory looking. If the alignment does not look right be sure to ask why.
Check the body lines make sure that they’re even. Uneven body gaps will allow water to penetrate and will corrode the inside. It is also your indicator that it has been through the shop for a major body work.
Check for awkward dents to make sure that it was not wrecked. Sometimes wrecked vehicles will still have those after it’s been done over. It will still leave small indicators like that. So make sure that you watch out for those.
Look for scratches and dings. It should tell you how the car was used. You can also use it to to knock down the price a bit. Check the inside seams, make sure that they’re all still factory looking. If the alignment does not look right be sure to ask why.
Check the body lines make sure that they’re even. Uneven body gaps will allow water to penetrate and will corrode the inside. It is also your indicator that it has been through the shop for a major body work.
 Tires can tell alot about the car. Make sure that they match, if not ask why. They have played around with it for a reason.
Check the wear on the tires, make sure the depths of the thread are still good, not enough depth means you will have to replace it soon half a finger nail will last a while.
Make sure that the steel radio belt is not sticking out. A wear like this is an indicator that there’s a problem with it’s suspension.
Tires have 4 digit codes:
Tires can tell alot about the car. Make sure that they match, if not ask why. They have played around with it for a reason.
Check the wear on the tires, make sure the depths of the thread are still good, not enough depth means you will have to replace it soon half a finger nail will last a while.
Make sure that the steel radio belt is not sticking out. A wear like this is an indicator that there’s a problem with it’s suspension.
Tires have 4 digit codes:
 Odometers are often rolled back so the seller can make more money. Cars with low mileage are priced higher. Ommit 35000-40000 miles and it will artificially inflates the value to about $2500 to $3000.
Here are a few tips to determine if the odometer has been tampered.
Odometers are often rolled back so the seller can make more money. Cars with low mileage are priced higher. Ommit 35000-40000 miles and it will artificially inflates the value to about $2500 to $3000.
Here are a few tips to determine if the odometer has been tampered.
 Checking the fluids will help you determine if the car was properly maintained. It will help you know potential issues that may arise in the future.
 Check engine for leaks. Look under the vehicle and see if you find any.
Look at the check engine light make sure that it will not stay on when you start the vehicle. If it stays on that means that the engine has a problem.
Perform an initial engine test.
Check engine for leaks. Look under the vehicle and see if you find any.
Look at the check engine light make sure that it will not stay on when you start the vehicle. If it stays on that means that the engine has a problem.
Perform an initial engine test.
 Make sure that you check all the buttons. Make sure that each is functioning right.
 You may inspect the wiring physically if you are familiar with the path to how it was laid out or if you have a diagram on hand. You do that to check the obvious like missing and worn out wires.
Second, you should check if it is flowing properly. This is done by performing a grounding test using a multimeter or volt meter.You can bring a volt meter when you meet the seller, if you are going to a dealership they should readily have it there and you can just borrow it for the quick test
How to perform a quick grounding test:
You may inspect the wiring physically if you are familiar with the path to how it was laid out or if you have a diagram on hand. You do that to check the obvious like missing and worn out wires.
Second, you should check if it is flowing properly. This is done by performing a grounding test using a multimeter or volt meter.You can bring a volt meter when you meet the seller, if you are going to a dealership they should readily have it there and you can just borrow it for the quick test
How to perform a quick grounding test: